Thursday, January 26, 2017

Math Treasure Hunt

Forget drilling, this is one activity that could make your kids fall in love with multiplication. 


For a start, you need empty boxes or envelopes. I am feeling a little bit fancy, hence these colourful boxes. Inside these boxes, are clues that will lead the kids to a specific area in the house. There, they will find a multiplication problem which needs to be solved. The answer will help them decide which box should they pick next. They will continue doing that until the clues lead them to the final box.


 A little note to start the game, complete with the first clue. 


One look inside the box. 


Some of the clues. 

Tawaf leads to a painting of Kaabah. Meanwhile, the right clue requires the kids to look under our hand sanitizer spray. I have to say that if we are doing this again, I really need to step my game up. I thought that the clues are pretty subtle, but the kids were really quick to solve them.


Halfway through the activity. More and more empty slots.


All the boxes thrown aside.


 All the clues that they managed to solve.


The last box! I can't believe that they did it in less than 15 minutes.


These are the notes inside the last box. They get to watch their favourite cartoon show, eat some chocolates while they are at it and RM1, extra pocket money for the week. Sure, it is not much but what is more important is they had lots of fun throughout the activity.


Wednesday, January 18, 2017

Dinosaur Wooden Construction Kit


Bought these wooden dinosaur construction kits when we were in Australia three years ago at the Australian Geographic Store just before we went back to Malaysia for good. They had massive sales back then, so we bought several of them. The kids did two of the kits when AM was 6 and AZ was 4. But it was a miss and hit kind of thing because it was a little bit too complicated for them. They got really frustrated halfway through and stopped doing them altogether. And I ended up having to finish the construction all by myself. It was my mistake really, because it is clearly stated at the front of the kit, that it is suitable for ages 6+. Now that the kids are a little bit older, I suppose that they should give it another go.

AM chose the Stegosaurus kit while AZ chose Styracosaurus.


Included in the kit is this paper which contains the assembly instructions, complete with diagrams. 


 Wood boards for the dinosaur body parts. There are 24 easy slot together pieces to built the dinosaur.


 AZ carefully pushing out the pieces.


 You will also need to smooth all the rough edges with the sandpaper included in the kit.


 AM said that all the small dinosaurs are helping them building the dinosaur models. Here, some of the dinosaurs are seen lifting up the skeletons.


Basically, all the kids need to do is to put all the parts together by following the right order of numbers. Pieces are joined by interlocking the exact two area together that have the same numbers. They just need to look at the diagrams provided in the assembly instructions.

You don't really need to glue the parts as they fit perfectly. But of course you are allowed to use he glue it if you want all the parts to stick together permanently.

Oh, you can also varnish or paint the parts before or after the assembly. We opted neither, haha.  

 Stegosaurus beginning to take shape. 


One done! Look at those beautiful plates.


 Styracosaurus (pronounced Sty-Rack-Oh-Sore-Us).


 And another one finished.


The two dinosaur models looking so majestic.


The kids had so much fun assembling them. The project took almost an hour to finish with the kids taking breaks in between. I considered it a success!

Later, they played 'dinosaur museum' where all the small dinosaurs had to purchase tickets for entry. The kids made an object label at the front of the displayed exhibit.


You can also find these dinosaur construction kit at Daiso. I am not sure of the quality, though. Just hope that the boards are not too flimsy and the slots fit together.  Otherwise, you might want to check at Hamleys.


Monday, January 16, 2017

Lolly Stick Boats


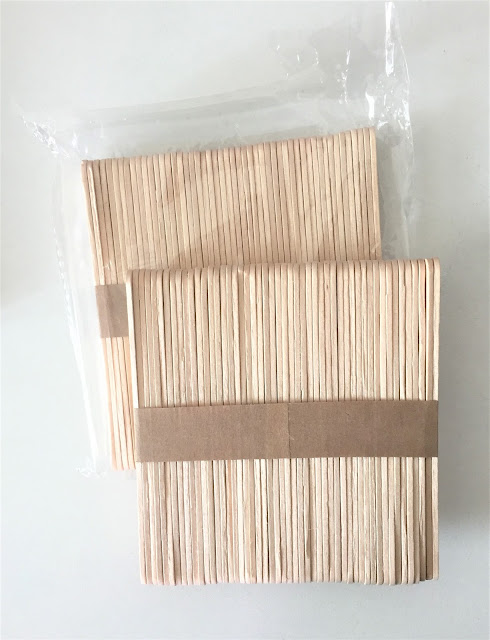
Bought these lolly sticks from Mr DIY from waaaay back. I couldn't remember the price but apa-apa pun mesti bawah RM5 rasanya.I had some rough ideas what to do with them, but the kids were into other projects at that time....until I saw how to make a lolly stick boat in one of the DIY book, I figured, why not?


You will get two bundles of lolly sticks in one packet. You can find them in different sizes as well as colours. Mine is the medium size lolly sticks, I think. 


There are many ways of doing the boat/raft. Whatever you and your kids want to call it. This is just one example that I show to my kids. The kids are, of course, free to design and built their own boats. First, arrange the lolly sticks side by side.


Next, glue them together. Remember, do not use water-based glue if you are planning to keep everything intact..


Finally, place several lolly sticks, one by one, across the glued lolly sticks. Let the glue dry. And decorate them with anything you like. You can paint the lolly sticks. Add paper sails. Whatever your heart desires. And you are done. It is super easy, right?

 The kids came out with several designs as you can see below.


 Beautiful sail with batik prints. All you need to do is cut a triangle from any coloured paper. Make sure you make two slits and carefully slide the sail onto the mast of your boat. 


AZ found easier way to do the sail. She just glued triangle shaped paper to the mast.


Another way to do the sail. Don't forget to use the pegs to make the lolly sticks glued better together.


AM's added a ring buoy made from button.


All the different boat designs by the four of us.


All that is left to do is to test them. 

My husband and I have been trying to make it a must for all of us to go to the park once a week. And we are so lucky to live so near to TTDI park, which to us is a gem. We have done so many activities there; cycling, fish feeding, playing bubbles etc. We have been trying to let the kids play at the small stream there but the place is normally pack with people. So last weekend, I seriously thought that we should just try out our luck and we tried to come as early as we could and brought our lolly stick boats too.


Yup, still lots of people but we managed to find a spot. 
Yeay to us!


1,2,3....Off the boats went!

Our first sailboat racing to mark the start of a new year.


It was so much fun to see the kids running and jumping while rooting for their boats to win. 

Later we discussed how some boats are faster than the others and how we can make several adjustments to the designs to help the boats sail better. Throughout the whole process, the kids learn how some things float and others sink. They also learn how big ships are able to float even though they are heavy. 

You might want to give it a try. Even if it means testing the lolly stick boats in your tub. 

Thursday, January 5, 2017

The Qym Planner Kit: January Main Kit Edition Review

Received the January Main Kit Edition from @theqymplannerkit or @plannermalaysia. I had a three month subscription with them and this month is my first kit. This is the main kit, priced at RM55 (price for  month series) plus RM12 for postage. That means RM201 for the entire three months.

 So for each month, you are supposed to get all these:
-Sticky notes/Note page
-Sticker sheets
-Page Flags
-A Mini Journal
-Clips
-Pen/Pencil/Highlighter
-Washi Tape 
-A Specialty Item

They also have add on kits where you can get either two washi tapes OR three sticker sheets + three sticker flakes on top of your main kit. You just need to add RM12 (each).

 This is the whole look.


Notes from them. 


I really love that they include this in the kit. It gives you an illustration of all the items together with the prices. So basically I saved RM8 for this kit.


 The first item is this green polka-dot washi tape. 
Retail at RM6.


Next, is this multicolour gel pen that changes colour as you write. I have been looking for it for quite some time. So I am glad that they include this pen in this month kit. 
Price: RM5.


Another page marker to add to my collections. Since I have plenty of page markers, I try to maximize their uses. The kids use them to mark the Quranic/Iqra' page that they are currently at. They also use the page markers as decorations for their school projects. I remembered AM glued the woodland theme page markers all over his cardboard trees. 

You can also stick the cute page markers'characters on pencils. Find an empty box for a stage. Sit back and get yourself entertained by some puppet shows by the kids.
Price: RM9


A 40 sheets memo pad with floral theme. As you can see, the page has dotted lines and tick boxes. You can easily transformed it to a to-do list, grocery shopping list, projects that needs to be done etc. 
Price: RM18


 2017 calender sticker. I have the weekly insert system, so this might come in handy. 
Price: RM8.


Next, is this butterfly sticky notes. You can use it as wall deco or simply a memo pad. For RM16, I think it is a bit pricey.I have seen it at Lazada before. If you know Lazada well enough, you will notice how they have different prices for the same thing. You really have to spend more time to find vendor that sells the lowest price. So far I've seen one that sells this at RM7.80. I just thought that I can get two or three sticky notes with the same value of money. 


 The one at LAZADA.


...and guess what? This one at Shopee for just RM1.50!!


Then, I have two regular size papers with prints on them. 


The first one has green chevrons all over on one side. At the back, is this watermelon with/without seeds illustration that you can cut into small envelope. Or it can also function as pockets that you can put in your journal to hold small sticker flakes, notes, washi samples etc.


The second one has watermelon, pineapple and popsicle. And more watermelons and pineapples at the back. You can use these for decorations or laminate them for your planner page dividers. Altogether, the price is RM8.


 Lastly is this Midsummer letter set which consists of one paper and an envelope. 
Price: RM5.

 Overall, I would say that I am somewhere in between. No major love or hate. I like all the items received. They are all in great conditions. I just wish with RM55, they could curate more items. How? RM18 for one memo pad. They could use the same money for two memo pads. Or the RM5 for A letter set. I could have FIVE letter sets (five papers and five envelopes) with that price. And RM8 for two pattern papers is a tad too much, don't you think? And that butterfly deco stickers, they need to be more careful when they set on the pricing. 

I have nothing but warm wishes to the team. Here, I am hoping that the next month kit will WOW me more. More unique items with reasonable prices, please!