This is a month plus plus due post. I was supposed to blog about the February and March Main Kit Edition last month but I've got so many things on my hand at the moment, I can barely find my ME time. Let alone do my creative work. I figured out the best way of doing it is to do the review of both kits in one blog entry. How about that?
I will start with the February Kit. If you want to read my review on the January Main Edition Kit you can read it here. Anyways, these are what you will receive if you subscribe to last month kit.
The first thing that caught my attention is the burlap drawstring pouch with bunnies and floral prints. This heavyweight fabric can be used to protect your planner from scratches or stains and judging from the size of it, I guess it will fit the A5 planner best.
But I love the rugged leather look of my planner. And as you can see, the pouch is way too large for my personal sized journal. So I gave it to AZ so she bring it to school to put her P.E shirts in.
Next is this black ink fountain pen together with its refill. Love the inscription of the brand on the lid. Now this is what I meant when I said in last month kit review that I wished they would come out with novelty items. I don't mind paying extra for things that are unique or truly theirs.
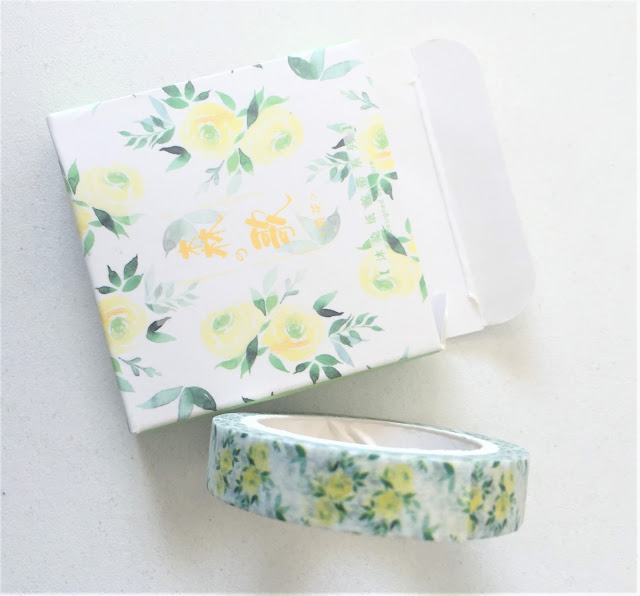
Then, I got this green and yellow floral washi tape. Retail at RM 6.
This grey, square, marbled sticky notes is next on the list. You have ample space to write your notes on as it is slightly bigger than the normal yellow sticky notes that you can easily find at normal stores. Price: RM 9.
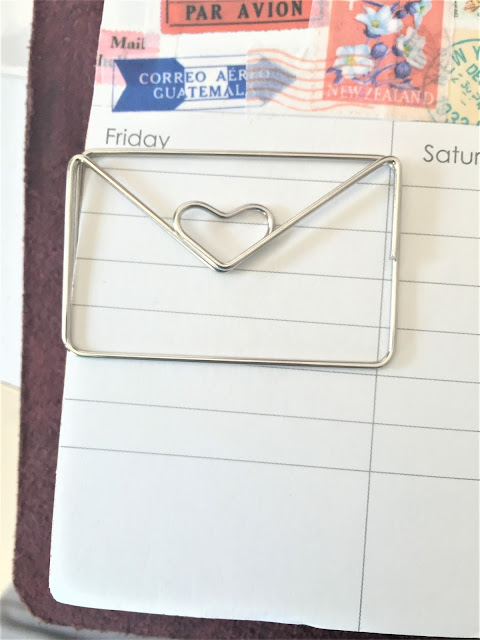
Small card with envelope shaped bookmark at the front. Price: RM 9.
The last item are these emoji stickers. RM12 for the whole bunch.
Next is the March Kit. There are ten items in this month kit as you can see below.
A notebook with lines from Wordsworth's Daffodills at the front cover. Retail at RM10.
It is a single line notebook.
Another set of emoji stickers. But fret not, they are different set of emojis compared to those from the February Kit. Retail at RM12.
This sticky note may look like page markers but the width is a lot bigger than the normal ones. It has that pink ombre effect that made it unique. Retail at RM 9.
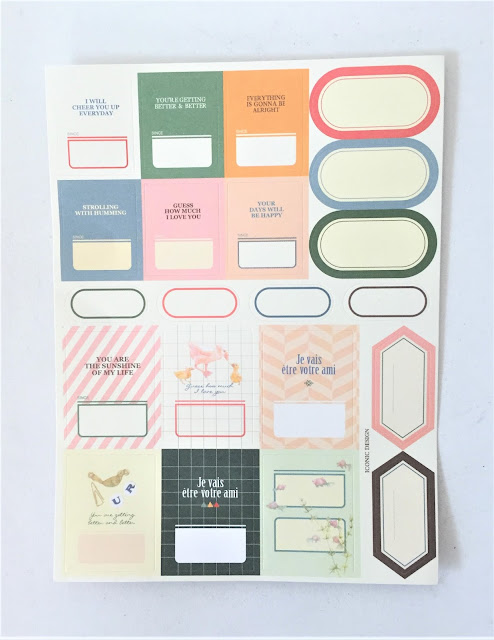
More labels...not that I mind getting them at all. I found them to be really handy for my monthly journal. You can use them to label your appointments and highlights important things in your schedule. Price: RM 9.
Purple fine tip pen at RM 8. This one writes really well and it doesn't bleed the pages of my journal, which is a big yes for me.
And four pieces of journaling cards. I am not sure how I am going to use them yet. Probably as tip-ins instead of dashboards.
You will notice these cards are gold foiled. and they retail at RM 16.
However, two of the cards have stains. They are not that obvious but no one likes to see dents on your new car, right?
Lastly is this black and gold foiled Christmas themed washi tape. If only it is December, then it would be more appropriate, wouldn't it? Price: RM 8.
Overall, I would say that if you love receiving stationery handpicked for you, you might want to subscribe with Planner Malaysia. I have subscribed with them since last January and the kits will arrive at my home on the first week of every month without fail.
I do wish that they are more careful with the pricing especially with the existence of Daiso, ezbuy and Mr DIY. People would compare that with the same price that they are paying for the subscription, they will get the same items in larger quantities if they buy them elsewhere. But I do hope that they also know that stationery lovers are willing to pay extra for unique items in a heartbeat.
Thursday, April 6, 2017
Friday, March 3, 2017
Self Portrait Kids
Ever wonder why toddlers tend to draw stick men? Only later as they grow up, their drawings start to take the human form. Once a stick leg now has knee, foot and toes. The eyes have brows and lashes, nostrils replacing the one lined nose. And lips, teeth and tongue, rather than the wide letter 'U'.
It is very crucial for kids to be able to identify their body parts and being intentional about using them at the same time. The ability to integrate the brain and body helps them to reach automaticity that we as adults benefits from. Thus, the brain can stop working so hard to control movement as simple as reaching out your arms just to grab something. The brain can then focus on more complex tasks. One of them is learning new things.
There are many activities to make them more aware of their body parts. And this is one activity that you can do at home with your kids.
You need to have a large paper, well, it really depends on the size of your kids. We used two mahjong papers, glued at each end because the kids are going to have to trace themselves on the paper.
Once finished with the outline of their body, comes the detailing part. For the face, they need to look in the mirror and transmit the exact same reflection that they see onto the paper. It may sound easy and pretty straight forward but I realized that it is a big deal to some kids.
AZ had no problem doing the task. She is really comfortable with herself. But it was a different story with AM. He needed a lot of encouragement to simply do it. Oh, it was never about the drawing part. We always knew that he is good at it. It is the taking-time-to-look-at-yourself-carefully part. Nevertheless, he finished it. I was so proud of him. He even said at the end that "I look really good, ibu."
I found this activity to be very beneficial for my kids. I knew that I need to encourage AM to be more comfortable in his own skin.
It is important to note that knowing about how one looks like, will encourage them to feel good about themselves. From acceptance, it builds self esteem and most importantly, love and respect to one self and other people who are different from them.
It is very crucial for kids to be able to identify their body parts and being intentional about using them at the same time. The ability to integrate the brain and body helps them to reach automaticity that we as adults benefits from. Thus, the brain can stop working so hard to control movement as simple as reaching out your arms just to grab something. The brain can then focus on more complex tasks. One of them is learning new things.
There are many activities to make them more aware of their body parts. And this is one activity that you can do at home with your kids.
You need to have a large paper, well, it really depends on the size of your kids. We used two mahjong papers, glued at each end because the kids are going to have to trace themselves on the paper.
AM tracing her sister.
AZ was pretty serious with this tracing business.
Having the most fun while tracing the fingers. They were a lot of giggles and laughter because it can be quite ticklish.
Once finished with the outline of their body, comes the detailing part. For the face, they need to look in the mirror and transmit the exact same reflection that they see onto the paper. It may sound easy and pretty straight forward but I realized that it is a big deal to some kids.
AZ had no problem doing the task. She is really comfortable with herself. But it was a different story with AM. He needed a lot of encouragement to simply do it. Oh, it was never about the drawing part. We always knew that he is good at it. It is the taking-time-to-look-at-yourself-carefully part. Nevertheless, he finished it. I was so proud of him. He even said at the end that "I look really good, ibu."
The outcome.
I found this activity to be very beneficial for my kids. I knew that I need to encourage AM to be more comfortable in his own skin.
It is important to note that knowing about how one looks like, will encourage them to feel good about themselves. From acceptance, it builds self esteem and most importantly, love and respect to one self and other people who are different from them.
Tuesday, February 14, 2017
Make Your Own Snakes & Ladders
It was nearing their exam week....and I was thinking really hard, how do I get them to study without stressing them out. If you ask me, I don't find the exams to be the most suitable tool to validate my kids. But, then again, it probably helps to increase their confidence if they get good marks. So, I guess, there is no harm done as long as I don't put too much pressure on them.
So I made my own Snakes & Ladders. You don't need to be a creative genius to do it. Some colourful pens and stickers will do just fine. The kids thought they are having fun, but they are doing revisions, really.
The only additional rule to this classic game is the kids need to be able to answer the questions correctly if they don't want to go a step backward.
There are mathematical problems to be solved, the meaning of words in Arabic and some Science facts. And while they are at it, why not do the neuro exercises as well. Get them to move those arms and legs. What is more interesting, these questions are not randomly picked. They are problems that have been posing challenges to them most of the time.
Building confidence and EQ while playing Snakes and Ladders is so unheard of....well, not anymore!
Monday, February 6, 2017
Thursday, January 26, 2017
Math Treasure Hunt
Forget drilling, this is one activity that could make your kids fall in love with multiplication.
For a start, you need empty boxes or envelopes. I am feeling a little bit fancy, hence these colourful boxes. Inside these boxes, are clues that will lead the kids to a specific area in the house. There, they will find a multiplication problem which needs to be solved. The answer will help them decide which box should they pick next. They will continue doing that until the clues lead them to the final box.

A little note to start the game, complete with the first clue.
One look inside the box.
Some of the clues.
Tawaf leads to a painting of Kaabah. Meanwhile, the right clue requires the kids to look under our hand sanitizer spray. I have to say that if we are doing this again, I really need to step my game up. I thought that the clues are pretty subtle, but the kids were really quick to solve them.
Halfway through the activity. More and more empty slots.
All the boxes thrown aside.
All the clues that they managed to solve.
The last box! I can't believe that they did it in less than 15 minutes.
Wednesday, January 18, 2017
Dinosaur Wooden Construction Kit
Bought these wooden dinosaur construction kits when we were in Australia three years ago at the Australian Geographic Store just before we went back to Malaysia for good. They had massive sales back then, so we bought several of them. The kids did two of the kits when AM was 6 and AZ was 4. But it was a miss and hit kind of thing because it was a little bit too complicated for them. They got really frustrated halfway through and stopped doing them altogether. And I ended up having to finish the construction all by myself. It was my mistake really, because it is clearly stated at the front of the kit, that it is suitable for ages 6+. Now that the kids are a little bit older, I suppose that they should give it another go.
AM chose the Stegosaurus kit while AZ chose Styracosaurus.
Included in the kit is this paper which contains the assembly instructions, complete with diagrams.
Wood boards for the dinosaur body parts. There are 24 easy slot together pieces to built the dinosaur.
AZ carefully pushing out the pieces.
You will also need to smooth all the rough edges with the sandpaper included in the kit.
AM said that all the small dinosaurs are helping them building the dinosaur models. Here, some of the dinosaurs are seen lifting up the skeletons.
Basically, all the kids need to do is to put all the parts together by following the right order of numbers. Pieces are joined by interlocking the exact two area together that have the same numbers. They just need to look at the diagrams provided in the assembly instructions.
You don't really need to glue the parts as they fit perfectly. But of course you are allowed to use he glue it if you want all the parts to stick together permanently.
Oh, you can also varnish or paint the parts before or after the assembly. We opted neither, haha.
Stegosaurus beginning to take shape.
One done! Look at those beautiful plates.
Styracosaurus (pronounced Sty-Rack-Oh-Sore-Us).
And another one finished.
The two dinosaur models looking so majestic.
The kids had so much fun assembling them. The project took almost an hour to finish with the kids taking breaks in between. I considered it a success!
Later, they played 'dinosaur museum' where all the small dinosaurs had to purchase tickets for entry. The kids made an object label at the front of the displayed exhibit.
You can also find these dinosaur construction kit at Daiso. I am not sure of the quality, though. Just hope that the boards are not too flimsy and the slots fit together. Otherwise, you might want to check at Hamleys.
Subscribe to:
Posts (Atom)


